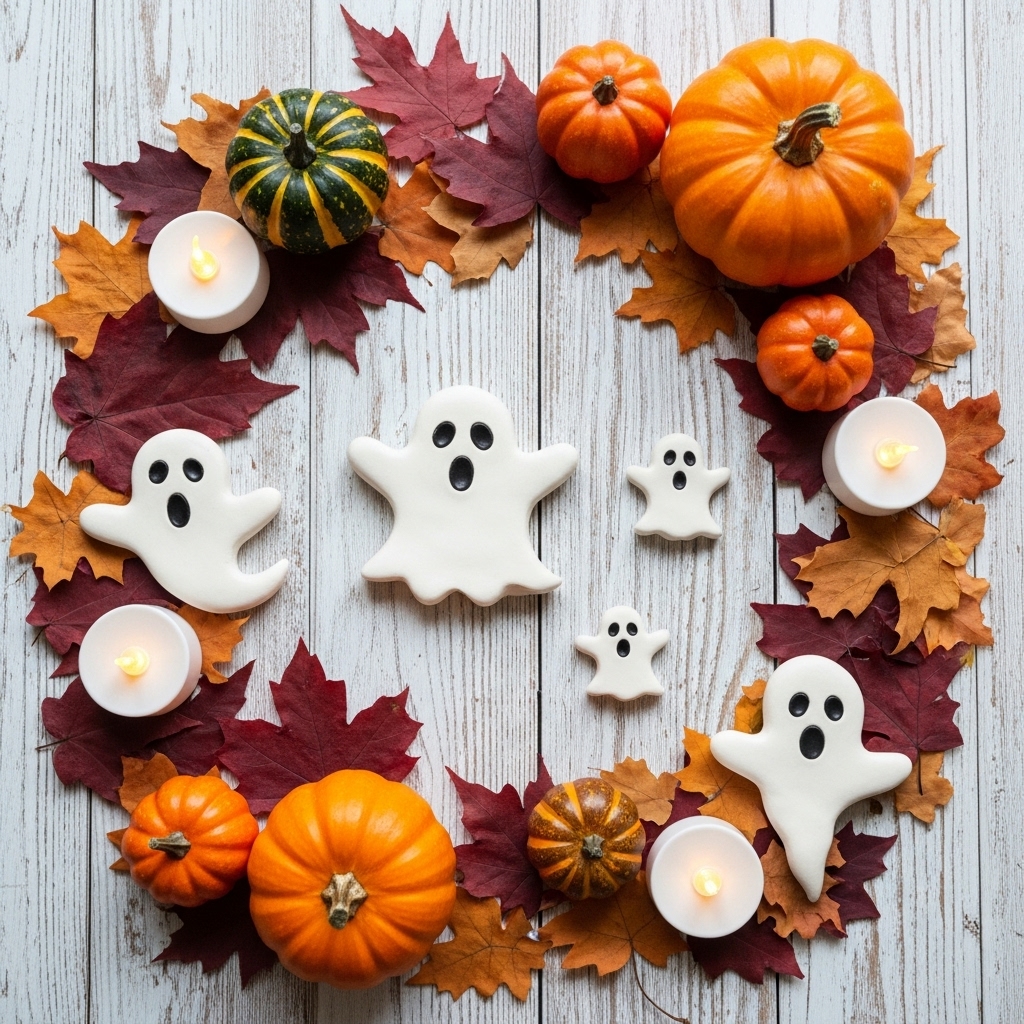
How To Make Air Dry Clay Ghosts for Halloween
Halloween is the perfect time of year to get creative with spooky yet adorable DIY projects. Among the countless decorations you can make at home, air dry clay ghosts are one of the simplest and most charming. They’re budget-friendly, fun to craft, and versatile enough to suit any Halloween aesthetic—whether you prefer cute and whimsical, or eerie and gothic.
In this step-by-step guide, we’ll walk through how to make air dry clay ghosts for Halloween, share creative variations (like a DIY air dry clay ghost pumpkin), and give you tips on styling these hauntingly cute decorations around your home. By the end, you’ll be ready to craft an entire ghostly crew for your Halloween party or seasonal décor.
Why Make Air Dry Clay Ghosts?
Air dry clay is one of the easiest materials for crafting. Unlike traditional clay, it doesn’t require baking or firing in a kiln—simply leave it out, and it hardens naturally. That makes it perfect for beginner-friendly Halloween crafts.
Here’s why these little ghosts are such a great project:
- Affordable – You only need clay, some basic tools, and optional paint.
- Kid-Friendly – Safe and fun for children (with adult supervision for sharp tools).
- Customizable – Shape your ghosts in endless sizes and styles.
- Reusable Décor – With proper care, they’ll last for years.
Plus, making them can be a fun fall activity to enjoy with family and friends, creating seasonal memories along with your decorations.
Supplies You’ll Need Air Dry Clay Ghosts for Halloween
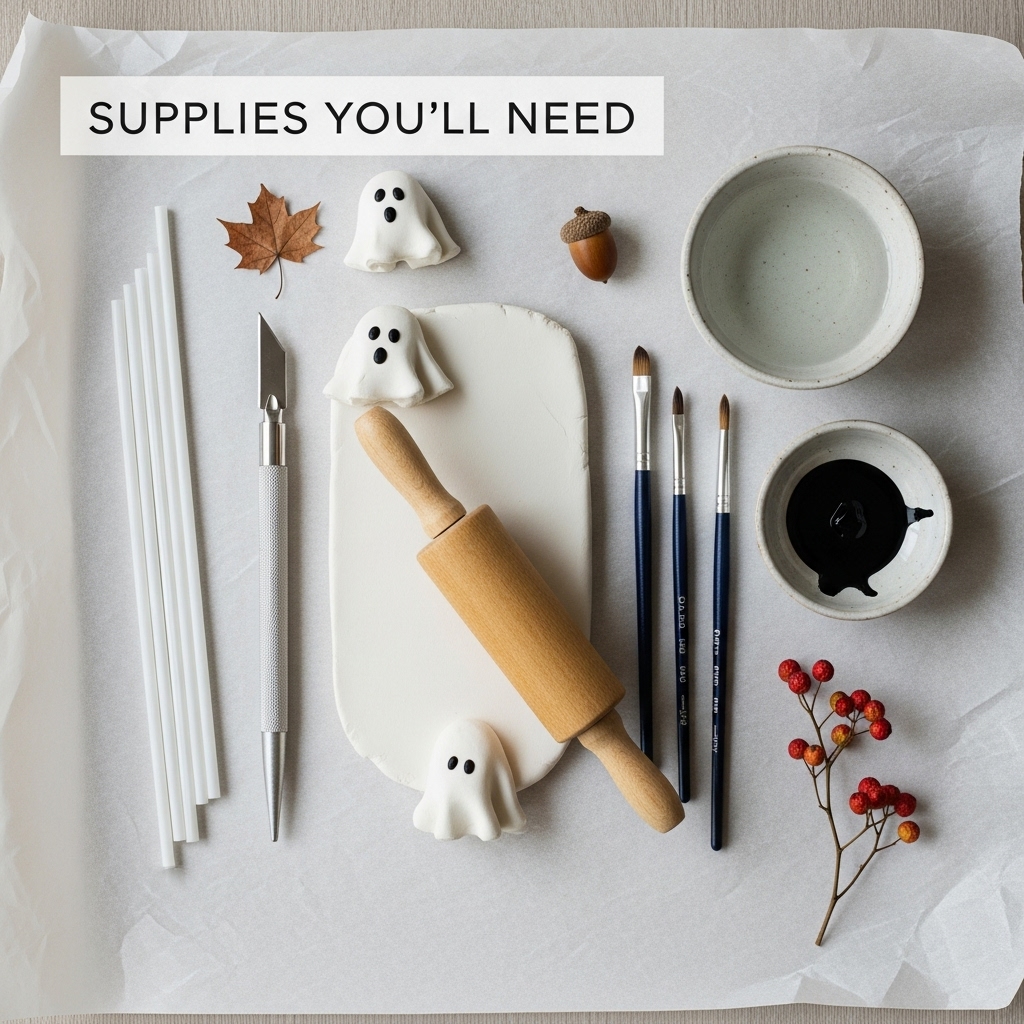
Before you begin, gather the following supplies:
- Air dry clay (white works best for ghosts)
- Rolling pin or smooth glass
- Small bowl or cup (to drape clay over for shape)
- Plastic wrap or parchment paper (to prevent sticking)
- Craft knife or sculpting tool
- Straws or skewers (for making eye holes)
- Acrylic paint or markers (black for eyes, optional colors for accents)
- Paintbrushes
- Sandpaper (optional) – for smoothing rough edges
Optional for variations:
- LED tea lights
- Small pumpkins for the DIY air dry clay ghost pumpkin project
- Metallic paint or glitter for a glam look
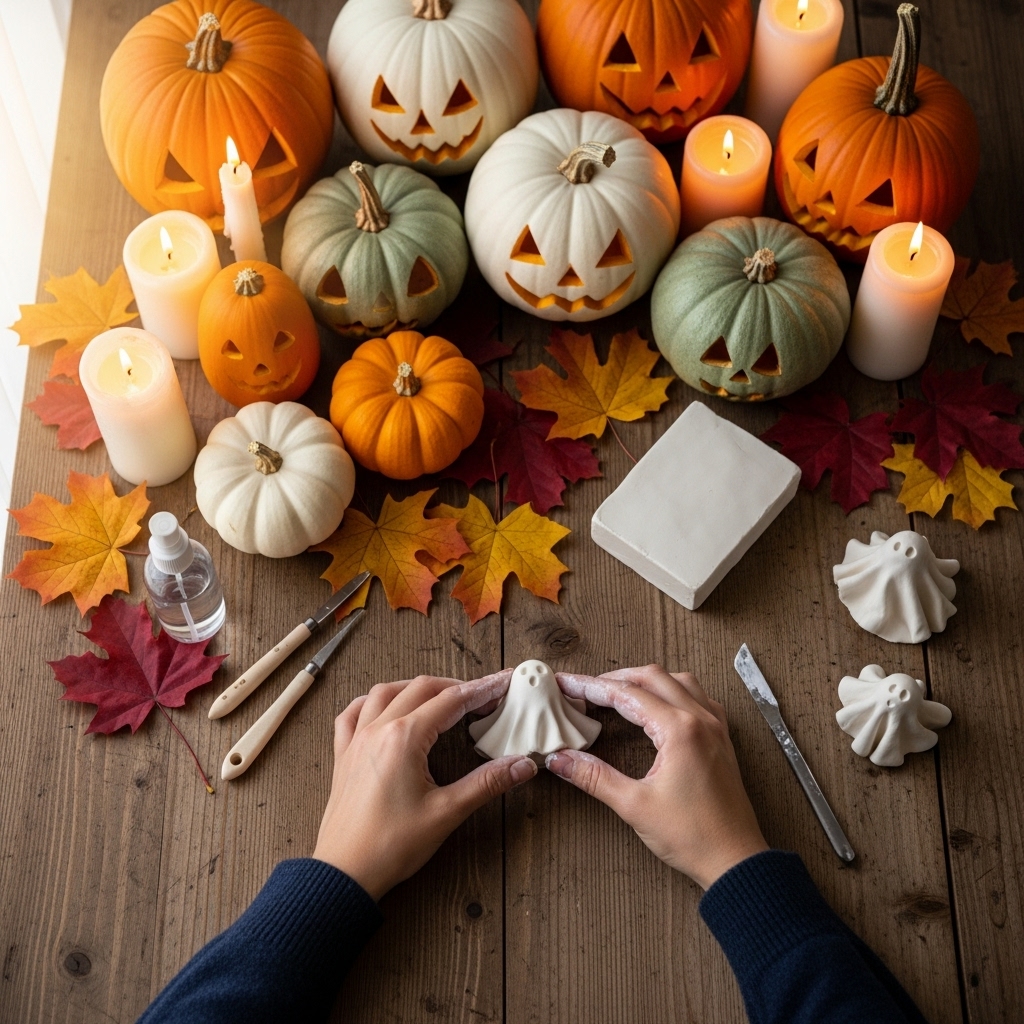
Step-By-Step Guide: How To Make Air Dry Clay Ghosts for Halloween
Let’s dive into the fun part—actually making your little spooky friends.
Step 1: Prep Your Workspace
Cover your work surface with parchment paper or a silicone mat to prevent sticking. Keep a damp cloth nearby to wipe your hands since air dry clay can dry your skin quickly.
Step 2: Roll Out the Clay
Take a ball of clay and roll it out until it’s about 1/4-inch thick. Try to keep it even so your ghost will have a smooth finish.
Step 3: Shape the Ghost
Cut the rolled-out clay into a rough circle or oval shape. Don’t worry about making it perfectly even—irregular edges make the ghost look more natural and spooky.
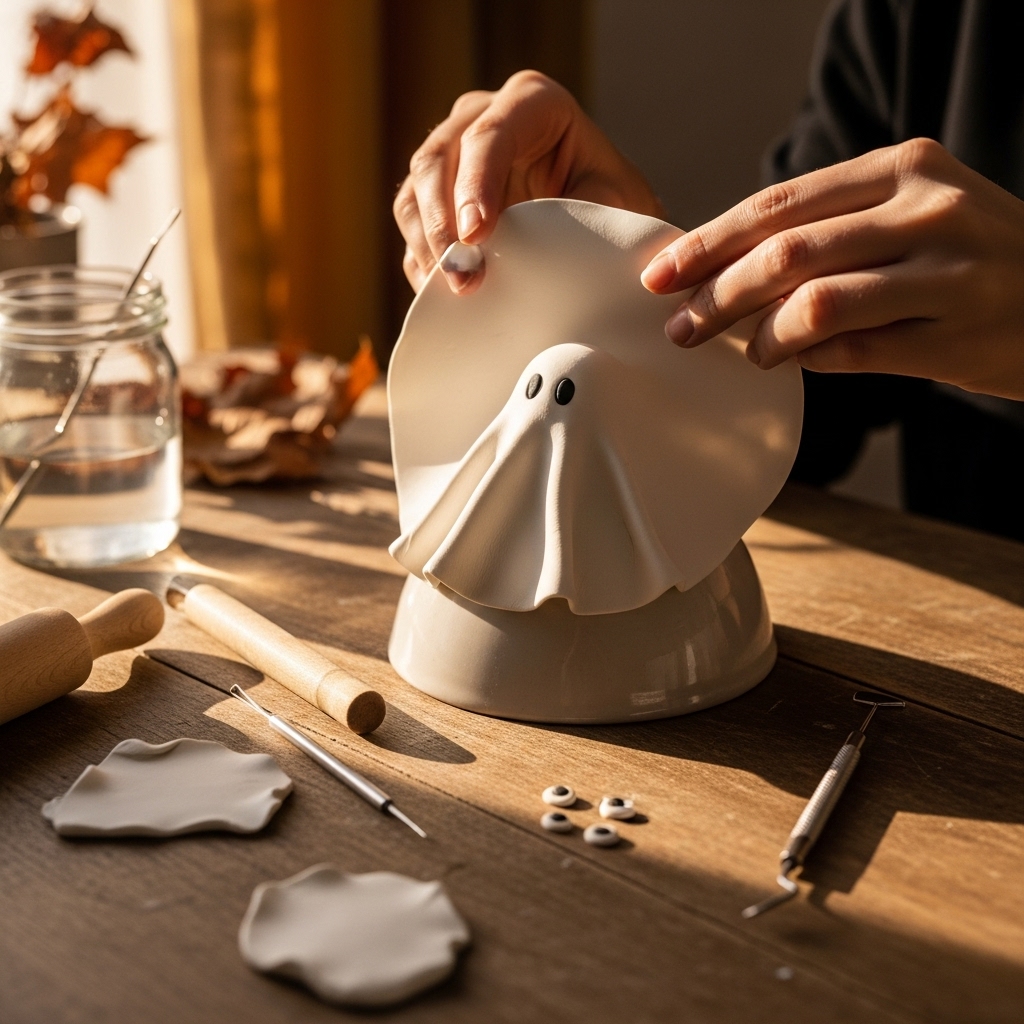
Step 4: Drape the Clay
Drape the clay circle over an upside-down cup, small bowl, or crumpled ball of foil. This will give the ghost its hollow shape. Smooth the folds gently with your fingers so they fall like flowing fabric.
Step 5: Create the Face
Using a straw or skewer, poke out two eye holes. You can also add a small oval mouth if you’d like a surprised ghost expression.
Step 6: Let It Dry
Leave your ghost on the mold until it hardens completely. Depending on the brand of clay and the thickness, drying can take anywhere from 24 to 72 hours. Rotate the ghost occasionally to ensure even drying.
Step 7: Smooth and Paint
Once hardened, lightly sand any rough edges. Paint the eye holes black or fill them in with a marker. If you want extra flair, paint the bottom edges with metallic gold, silver, or even a touch of glitter for a magical effect.
Creative Variations for Your Ghosts
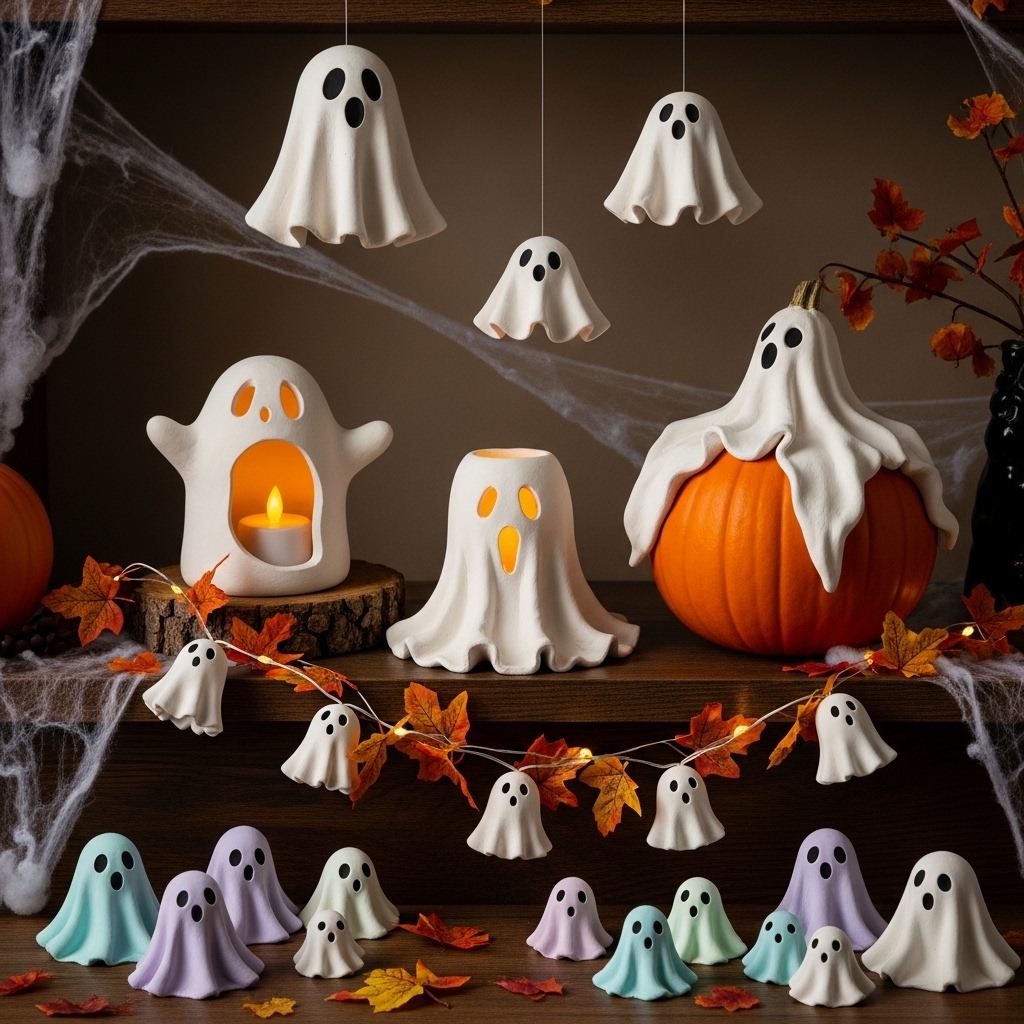
The beauty of this project is its flexibility. You can keep things simple with plain white ghosts or get creative with unique twists. Here are a few fun variations to try:
1. Mini Ghost Garland
Make several small ghosts and string them together with twine. Hang this across your mantel, porch, or above a window for a festive touch.
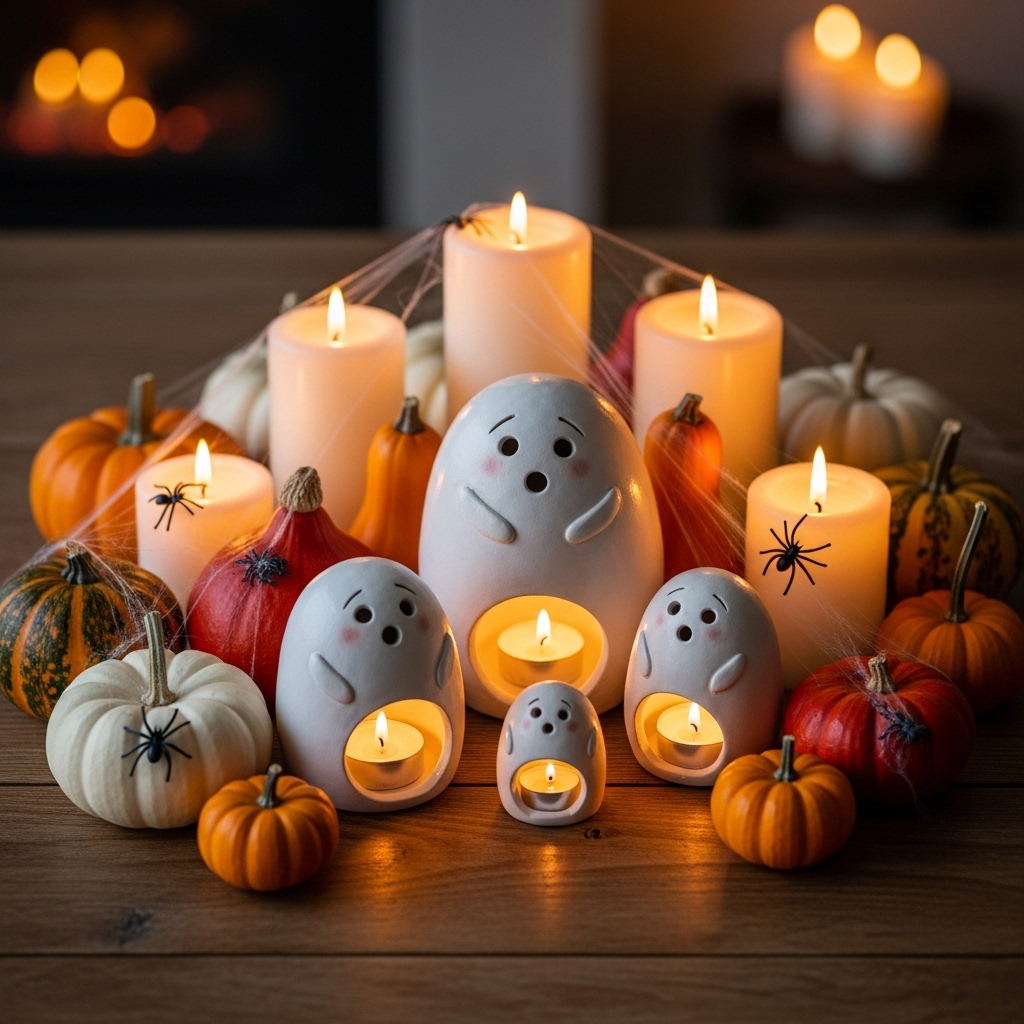
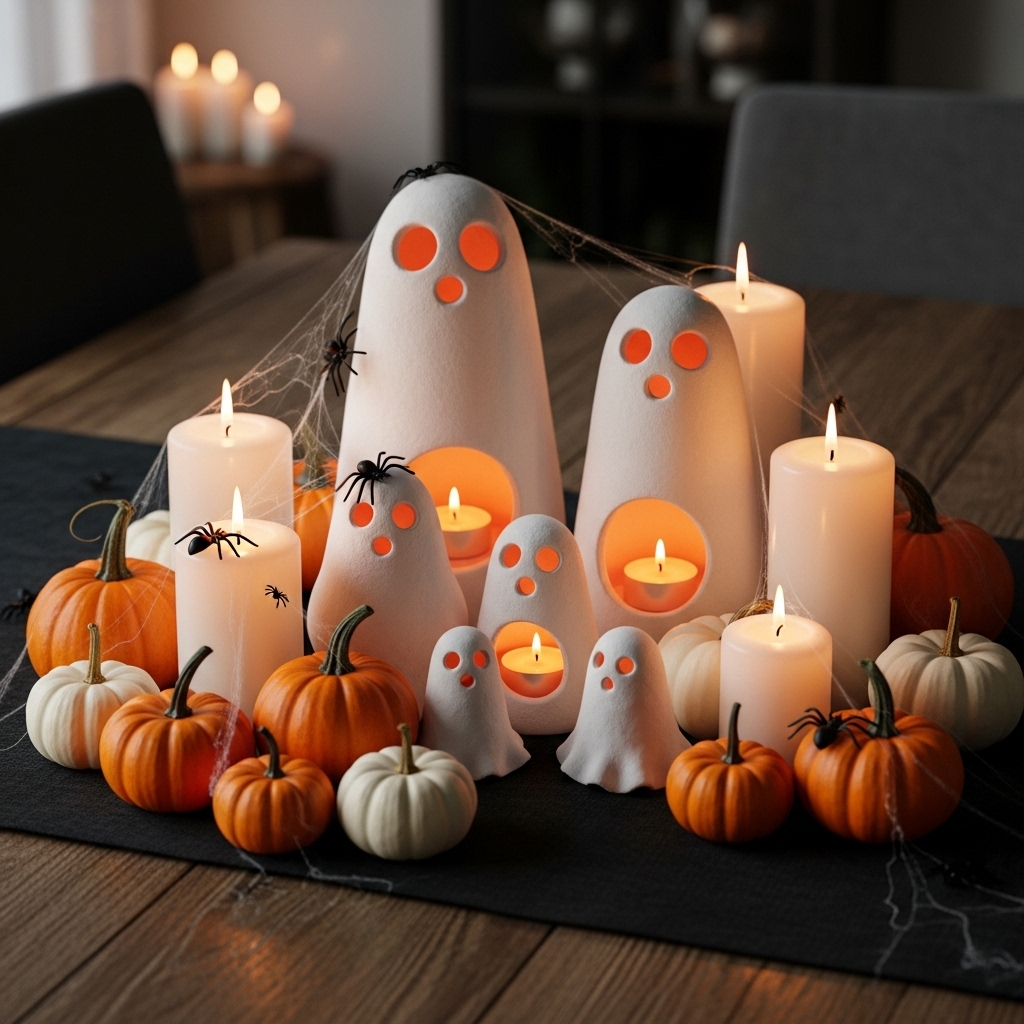
2. Candle Holder Ghosts
Shape your ghosts to be taller and wider at the base, then place a battery-powered tea light inside. When the light shines through the eyes, you’ll get a glowing, spooky effect.
3. DIY Air Dry Clay Ghost Pumpkin
Combine two classic Halloween icons by draping your ghost clay form over a small real or artificial pumpkin. Once dried, you’ll have a ghost that looks like it’s haunting a pumpkin—a perfect centerpiece idea for your Halloween table.
4. Painted Personality Ghosts
Instead of traditional white, paint your ghosts with pastel colors for a softer look, or go gothic with black and silver accents. You can even give each ghost a “costume” with painted-on details.
5. Hanging Ghosts
Before drying, poke a small hole at the top of the clay shape. Once hardened, thread ribbon or twine through and hang them from trees, chandeliers, or porch hooks.
- Keep It Damp: If the clay starts drying while you’re working, spritz it with water.
- Avoid Cracks: Don’t roll clay too thin—it’s more likely to crack while drying.
- Be Patient: Rushing the drying process can warp the shape. Let nature take its time.
- Store Safely: Once dry, seal your ghosts with a clear acrylic spray to protect them from moisture and extend their life.
Styling Your Air Dry Clay Ghosts
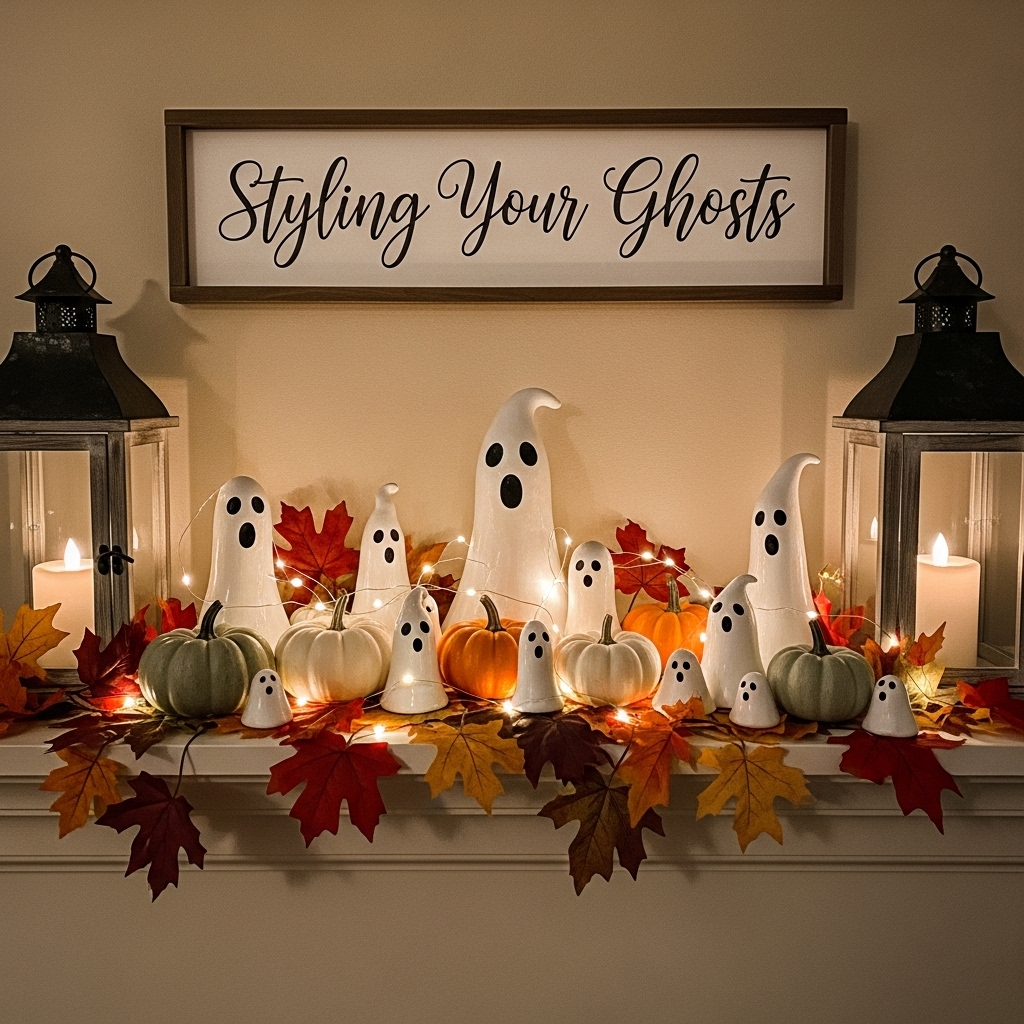
Once you’ve created your ghostly crew, the fun continues—styling them into your Halloween décor. Here are a few ideas:
- Table Centerpieces: Place several ghosts of different sizes on a tray with faux cobwebs, pumpkins, and fairy lights.
- Porch Decorations: Line your steps with glowing candle-holder ghosts to greet trick-or-treaters.
- Bookshelf Spookiness: Tuck mini ghosts between books, plants, and candles for subtle seasonal charm.
- Mantel Magic: Pair ghost figurines with dried leaves, bats, and rustic lanterns for a cozy haunted-house vibe.
Why This DIY Project Is Perfect for Halloween
Not only does this craft result in charming decorations, but it also provides a creative outlet during the spooky season. You can involve kids for an afternoon of fun or host a Halloween crafting party with friends. It’s low-cost, low-effort, and highly rewarding.
Plus, the final results aren’t just cute—they’re timeless. With the right care, you can store your ghosts and bring them out year after year, building up a collection of handmade treasures that become part of your holiday traditions.
Final Thoughts
Now that you know how to make air dry clay ghosts for Halloween, it’s time to roll up your sleeves and get crafting. These charming little figures are a simple way to bring a homemade touch to your seasonal décor, and they’re endlessly customizable.
Whether you stick with classic white figures or experiment with a DIY air dry clay ghost pumpkin, you’ll love the personal flair these decorations bring to your home. So gather your clay, set aside an afternoon, and let your creativity run wild. Before you know it, you’ll have a whole family of spooky, whimsical ghosts ready to haunt your Halloween festivities.